
Step 1: Configure Snowflake as a Source and Create Selligent Ads Destination
First, ensure that Snowflake is already configured as a source in DinMo, and Selligent has been added as a destination.
Step 2: Create Segments in DinMo
If you haven't created the segments you wish to sync, follow these steps:
Go to the Segments tab
Click on "New Segment" to create a new segment.
Define the appropriate rules for each segment.
Repeat this process to create all the necessary segments.
Step 3: Activate Segments to Selligent
Navigate to the Activations tab, and click "New Activation" in the upper-right corner of the screen.
Select the type of segment you wish to activate - either conversions (called events) or audiences (called users).
Select the segment you wish to sync to Selligent, and specify the appropriate Selligent option before clicking “Continue”.
Then, select Selligent from the platform dropdown and click “Continue”.
Choose the ad account you wish to use.
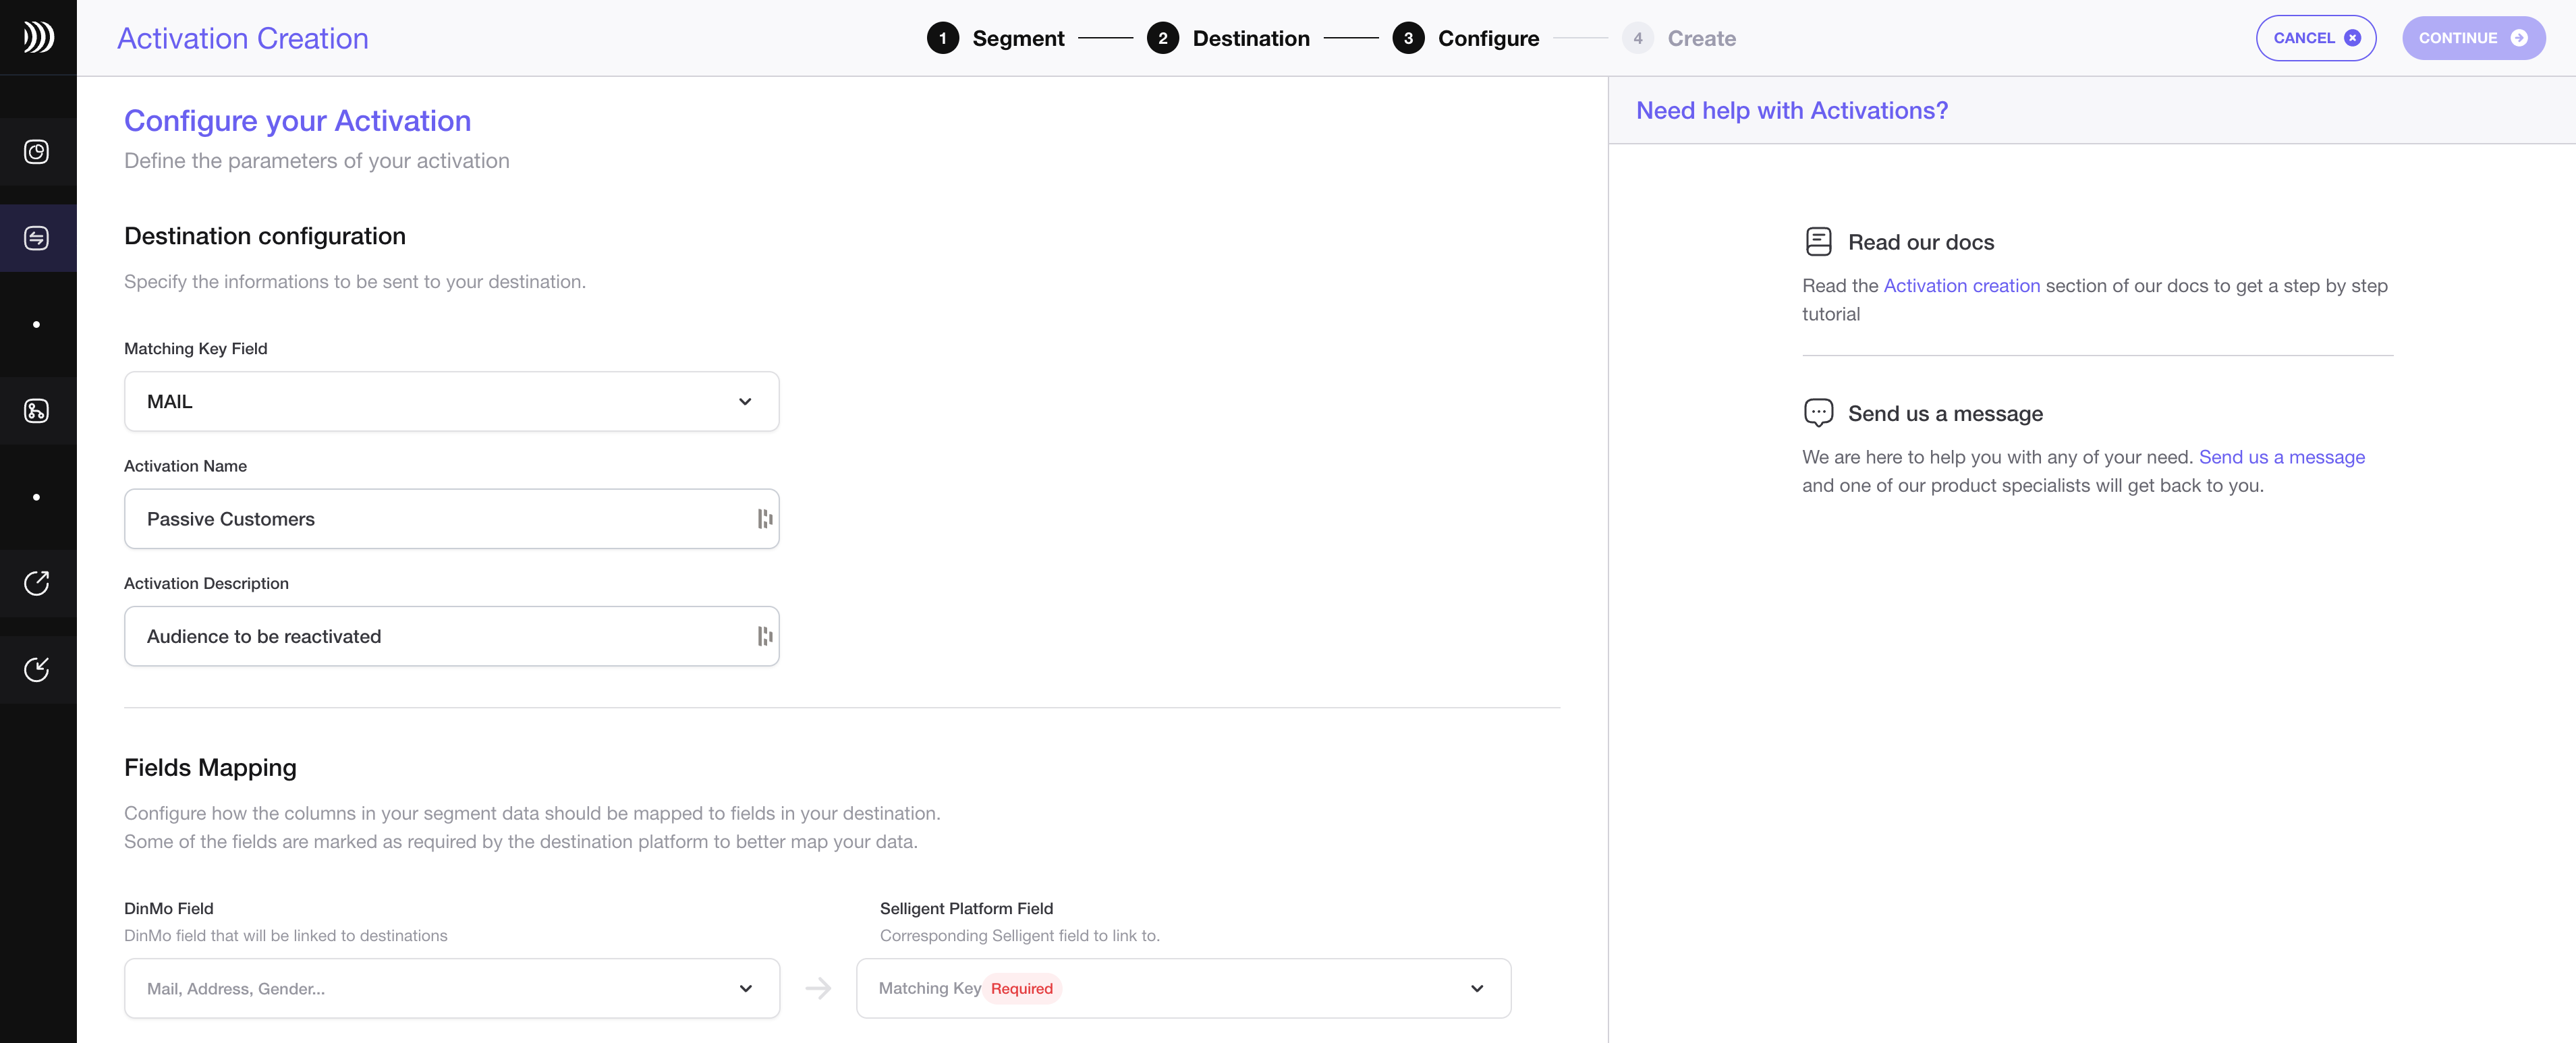
If you want to change the activation name, fill in the corresponding field. You can also add a description to this activation.
Specify the external ID that should be used by Selligent to identify your contacts.
To map the fields for user segments, specify which properties of your segment correspond to the mail address, phone number, first name, and last name.

Activate your Segment easily in Selligent with DinMo platform
Step 4: Customize Sync Settings and Create the Data Pipeline
Under the Scheduling options, choose the time interval for syncing your segments to Selligent. A daily sync is sufficient for most use cases.
Click "Continue," and then click "Create" to finish.
Once the activation is created, it should start syncing immediately. Wait a few moments to ensure that the sync is successful."
That's it! You have now successfully synced your Snowflake data warehouse with Selligent in DinMo.
Visit this page if you want to learn how to create and synchronize highly targeted audiences, for your Selligent activations.
If you face any questions, please refer to DinMo's documentation or contact our support team for assistance.


