
How to use DinMo to connect Snowflake to Instagram Ads?
First step is to ensure that Snowflake is already configured as a source in DinMo, and Meta Ads has been added as a destination.
Ensure that you have already created the segments that you wish to sync to Instagram Ads in DinMo. If not, go to the Segments tab, click "New Segment," and create them one by one with the appropriate rules.
Navigate to the Activations tab, and click "New Activation" in the upper-right corner of the screen.
Select the type of segment you wish to activate - either conversions (called events) or audiences (called users).
Select the segment you wish to sync to Meta Ads, and specify the appropriate Meta Ads option before clicking “Continue”.
Then, select your Meta Ads platform in the dropdown, and click “Continue”.

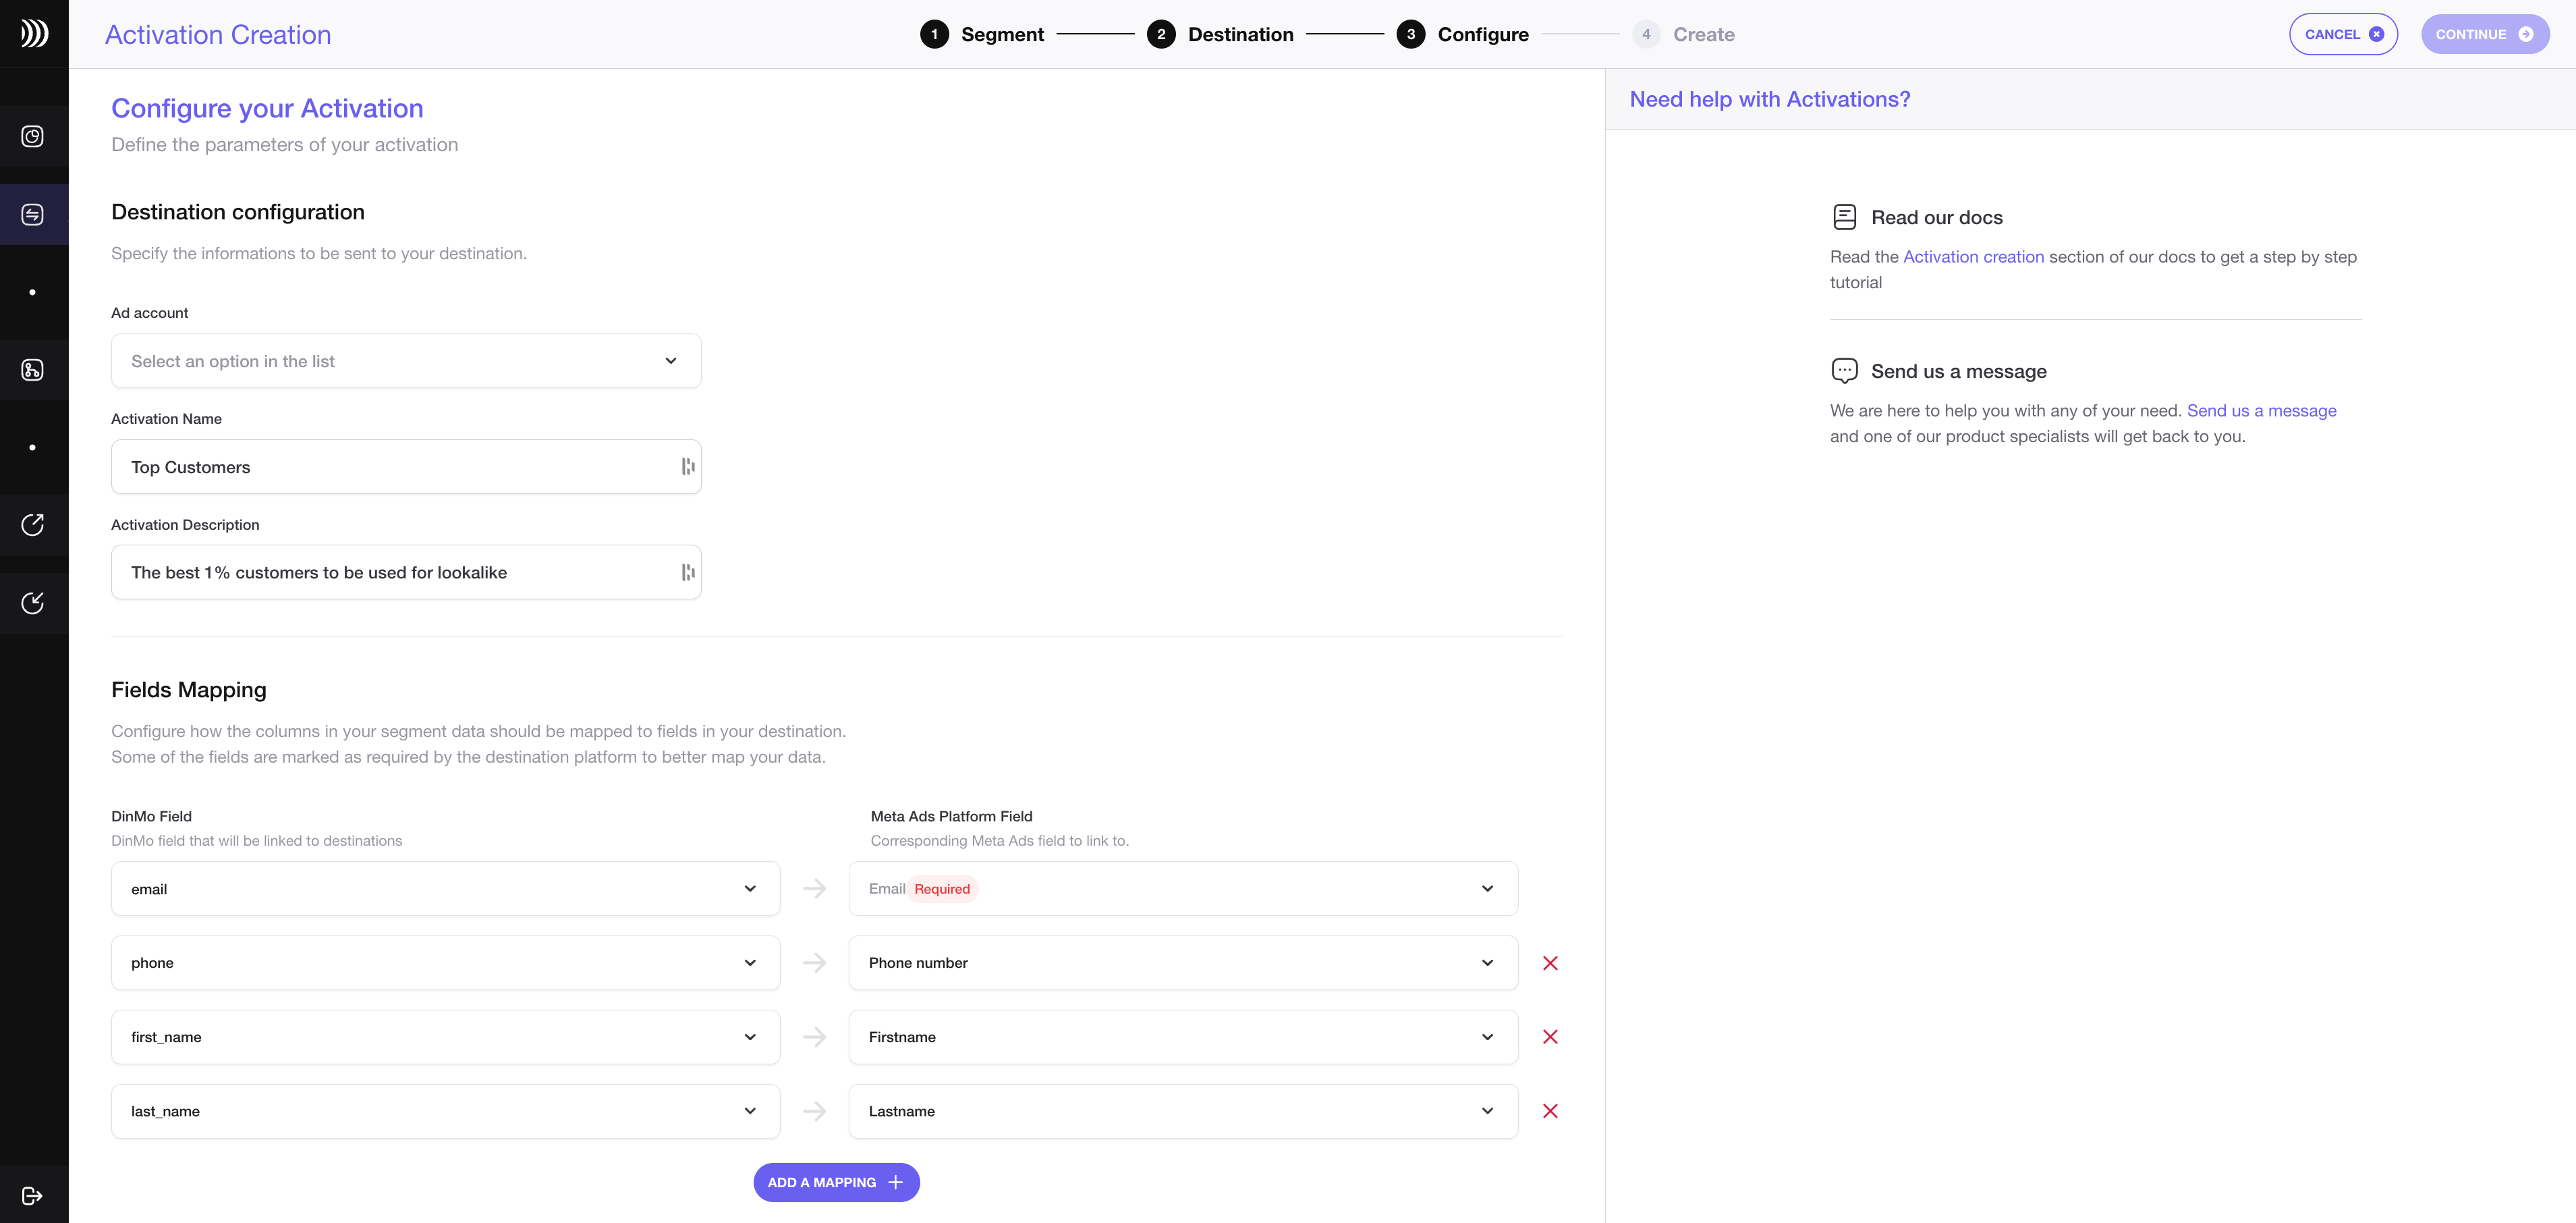
Configure your activation with Meta Ads
Choose the ad account you wish to use.
If you want to change the activation name, fill in the corresponding field. You can also add a description to this activation.
Fill in the mapping of the field. For user segments, you may specify which properties of your segment correspond to the mail address, the phone number, and to the first and last names.
Under the Scheduling options, choose at which time interval you want your segment to be synced to Meta Ads. A daily sync is sufficient for most use cases.
Click "Continue," and then click "Create" to finish.
Once the segment is created, it will start syncing right away. Wait a few moments to make sure that the sync is a success.
That's it! You have successfully synced your Snowflake data with Meta Ads in DinMo. If you face any issues, refer to DinMo's documentation or contact their support team for assistance.


